Update print information
This guide explains how to configure printer settings and update print information (headers, footers, logo, etc.) from the Merchant App.
Prerequisites
- You are logged into the Merchant App with edit access to Settings.
While making changes to printer settings in the Merchant App, make sure you have selected the desired terminal.
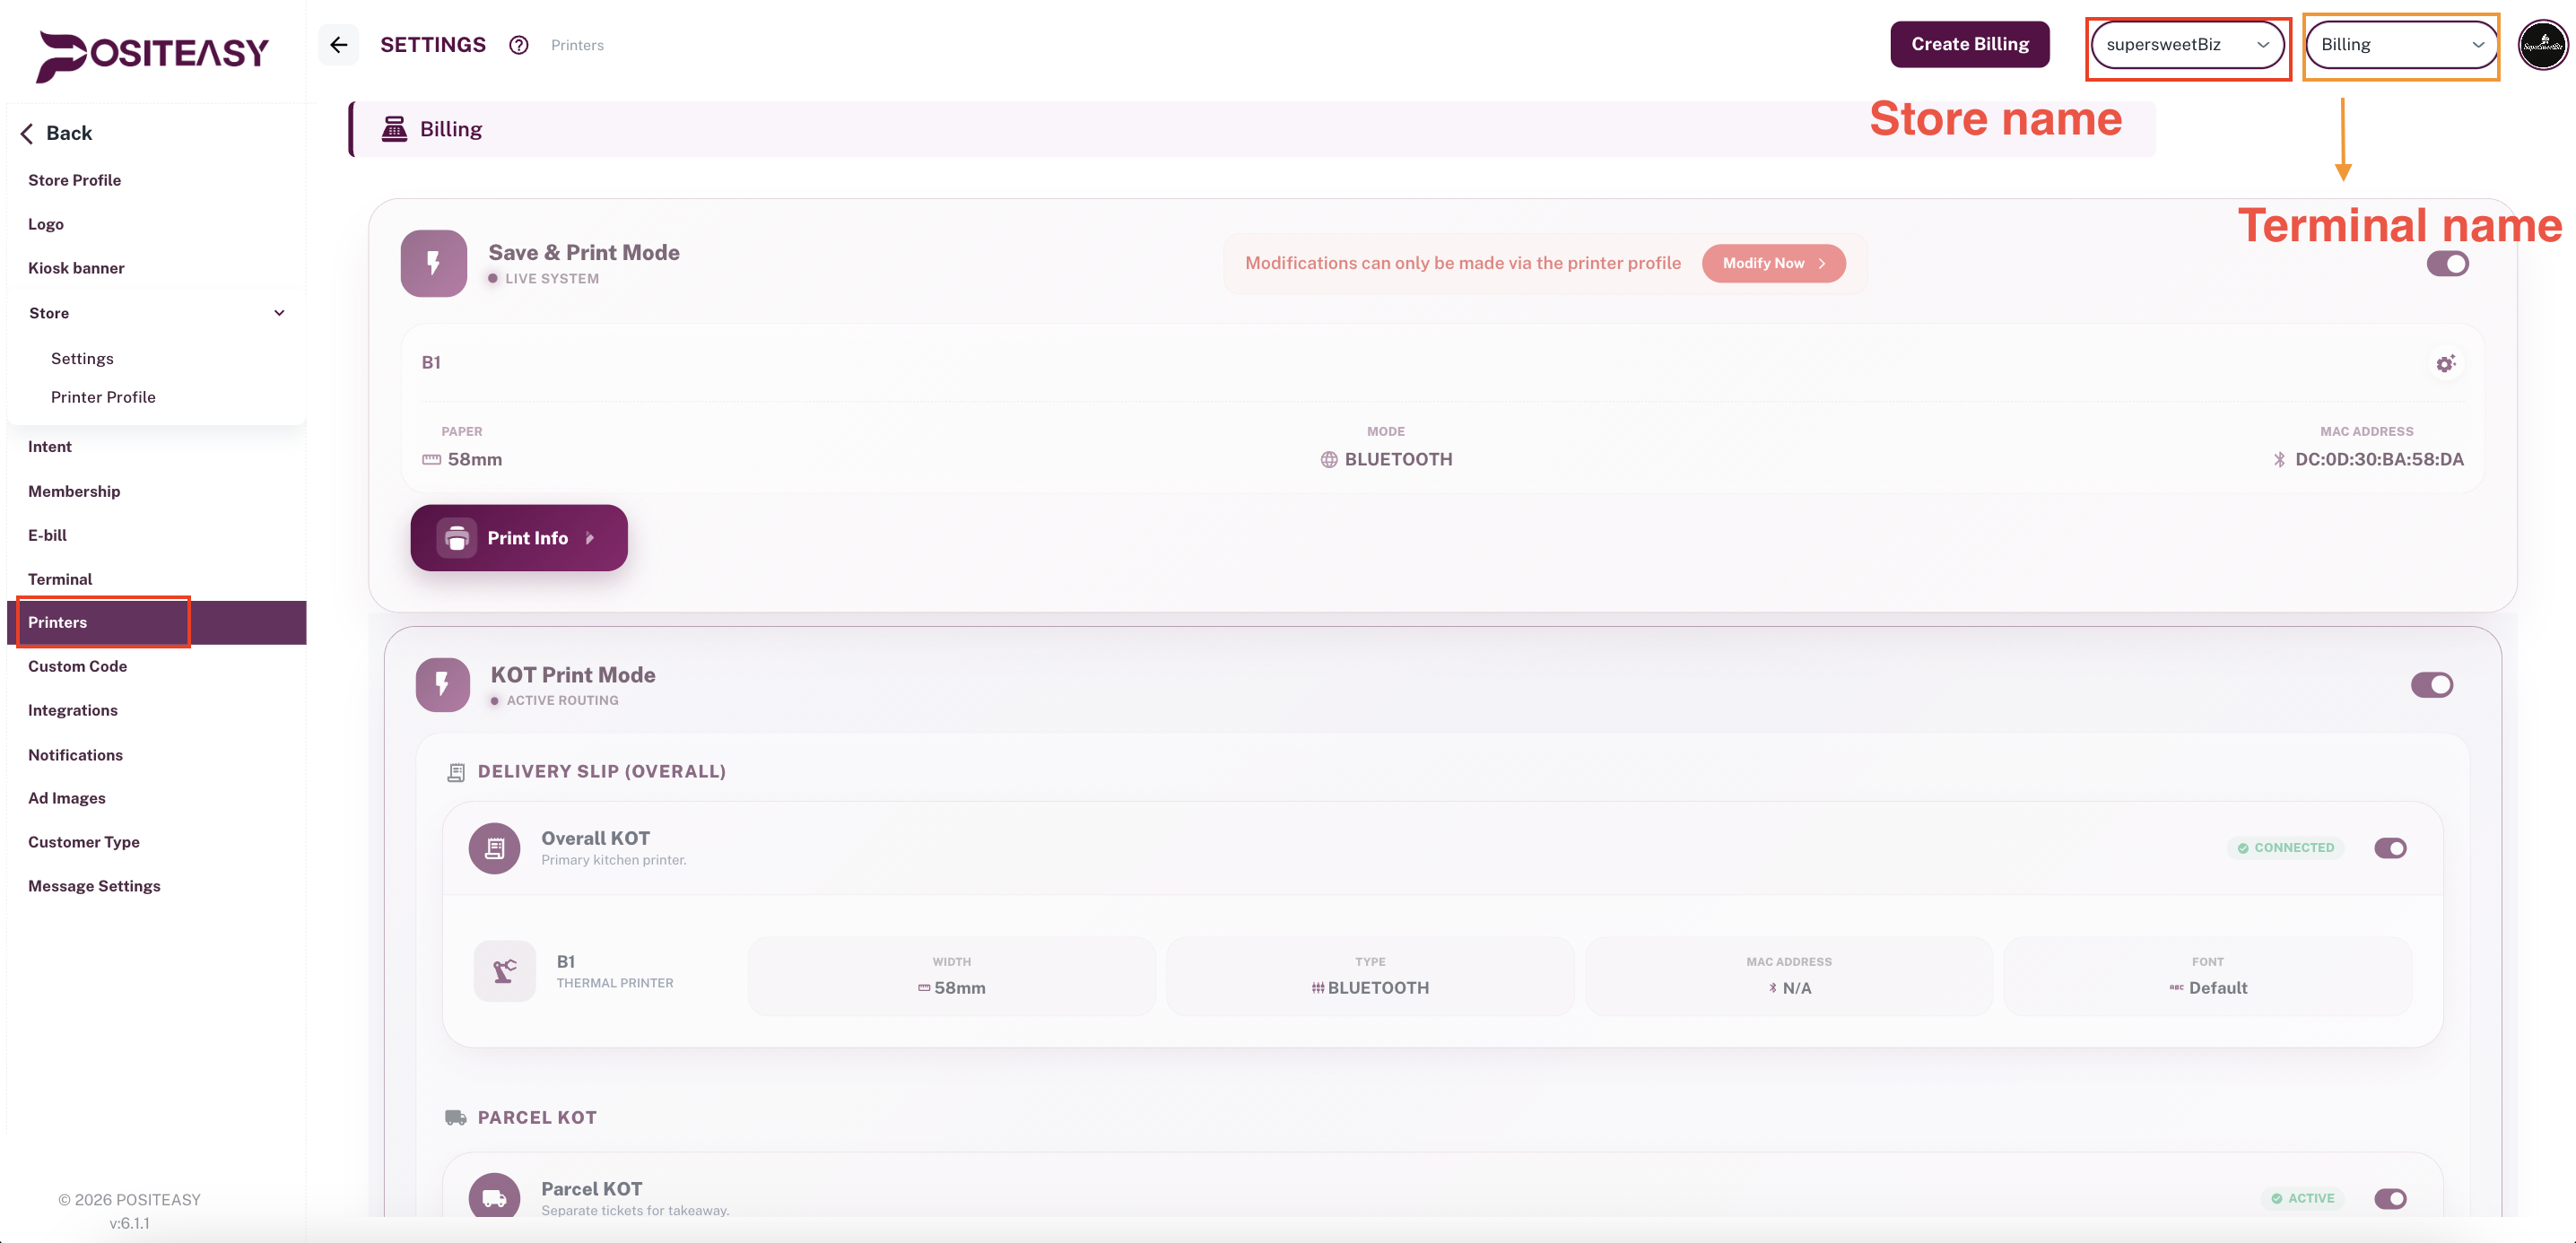
Step 1: Open printer settings
-
From the main navigation bar, go to Settings → Printers.
-
The Printer Configuration page opens, showing the current print settings.
-
Select the desired terminal.
-
Save & Normal Print Mode will be enabled if for the given terminal a printer profile is already created and route has been setup for Main receipt, Overall KOT etc.
Printer modes, KOTs, Online KOTs etc. will be enabled only when they are selected in the route setup of the printer profile for a given terminal. You cannot directly enable or disable them in the Printers section (settings->printers).
Step 2: Update basic printer information
Click the Print Info button.
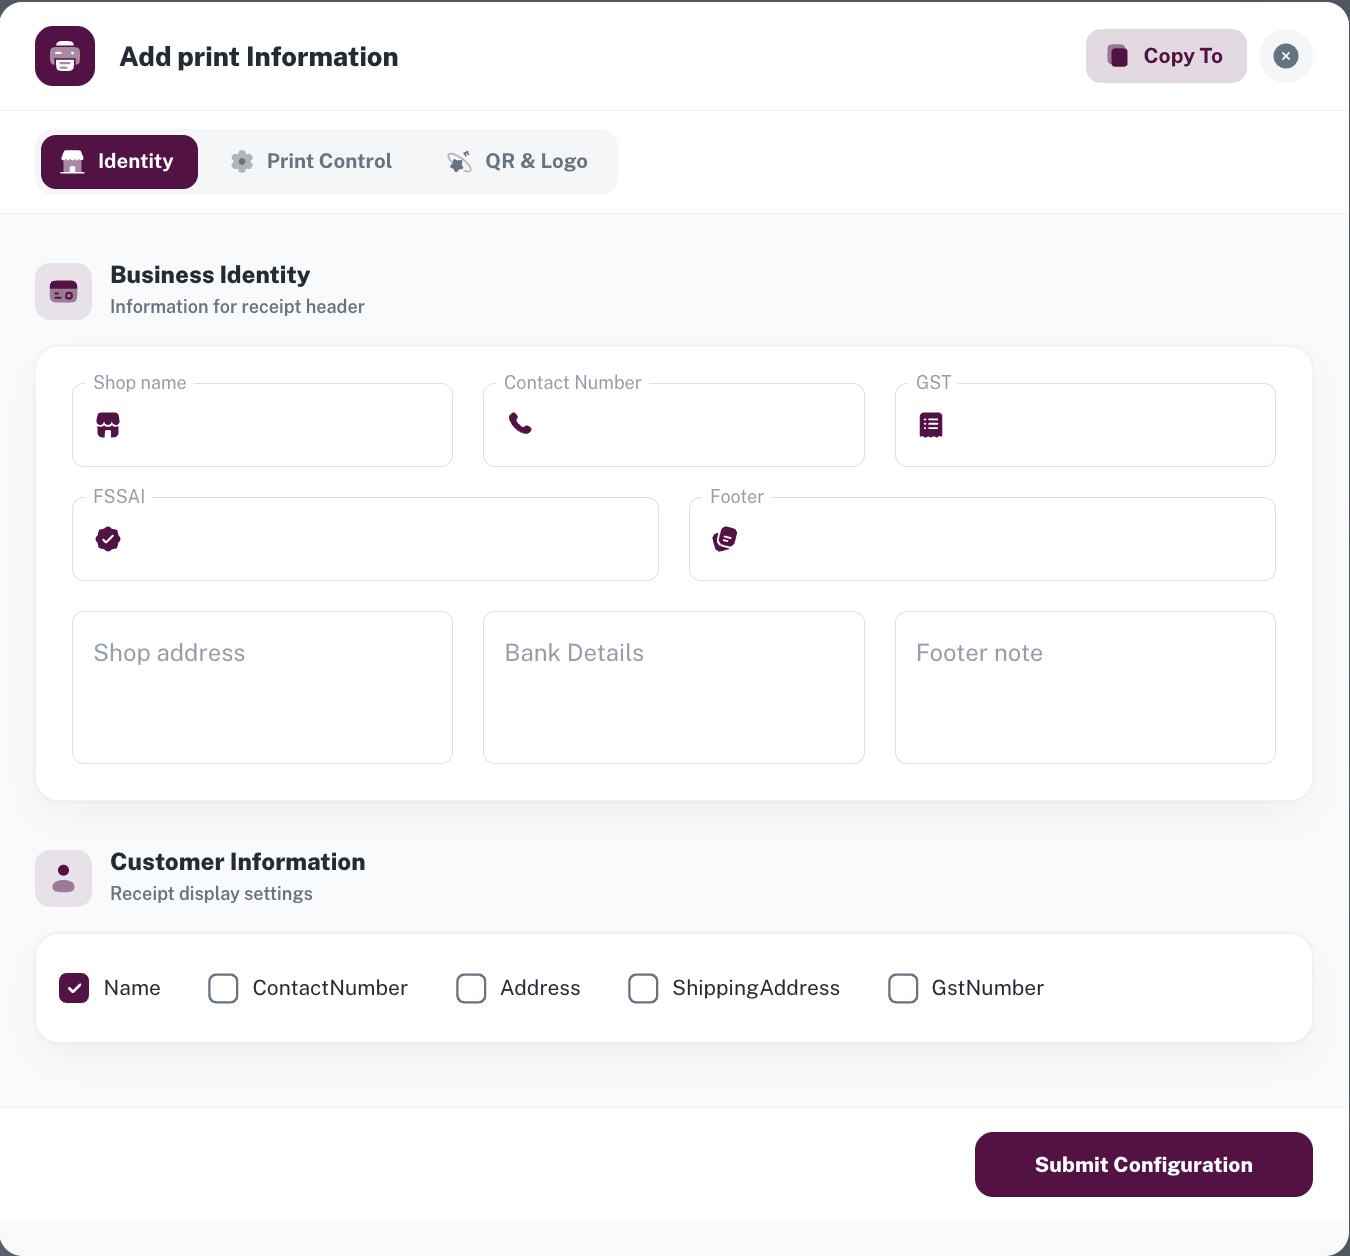
- In the Add Print Information/Identity section:
- Shop Name: Update the shop name to be printed in the receipt.
- Contact Number: Enter the contact number to be printed on the bill receipt.
- GST: Update the GST number.
- FSSAI: Enter the FSSAI license number.
- Footer: Enter footer text (thank-you message, timings, website, etc.).
- Shop Address: Update the complete shop address for bills.
- Bank Details: Add bank account details for payments (optional).
- Footer Note: Add additional footer notes or disclaimers.
In the Customer Information section, control which customer details appear on the receipt:
- Name: Prints the customer’s name.
- Contact Number: Prints the customer’s mobile number.
- Address: Prints the customer’s delivery address.
- Shipping Address: Prints the customer’s shipping address.
- GSTNumber: Prints the customer’s GST number (useful for B2B bills).
Step 3: Configure advanced print settings
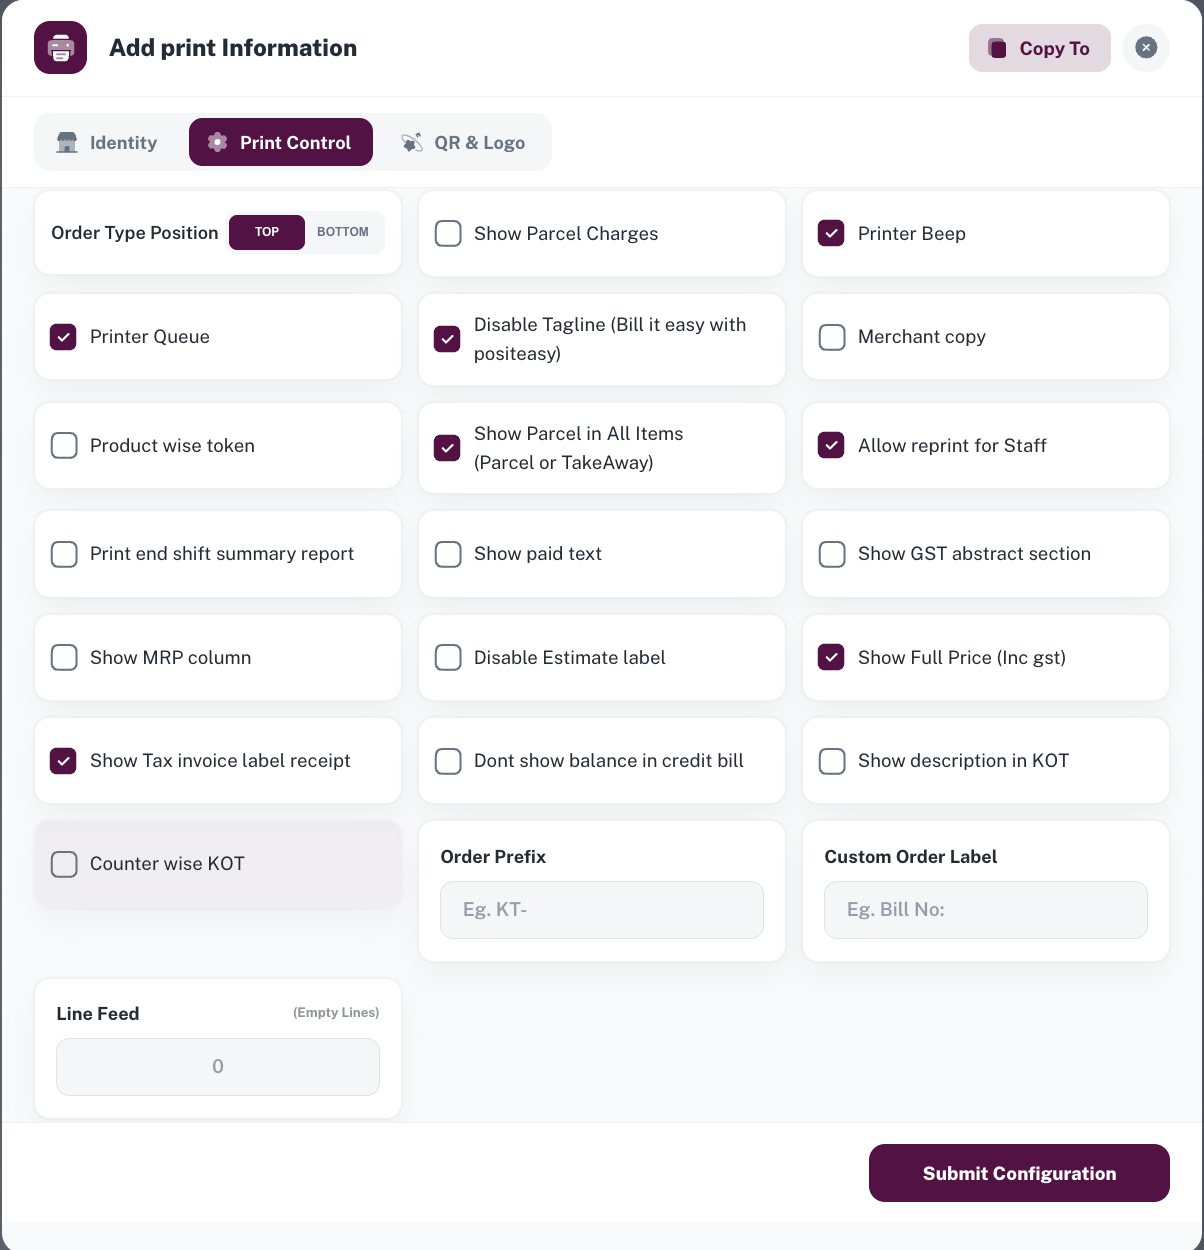
- In the Add Print Information/Print Control section: Enable the settings suitable for your restaurant:
- Order type position(Top/Bottom): Based on the selection, the order type will be printed either on top or bottom of the print.
- Show parcel charges: Prints parcel charges separately (sum of individual item parcel charges).
- Printer Beep: A beep sound will play before printing (printer must support this feature).
- Printer queue: Queues print jobs and prints them sequentially to prevent overlaps or missed prints.
- Disable POS tagline on receipt: The Positeasy tagline will not be printed.
- Merchant copy: Prints an extra copy of the bill with Merchant Copy text in the top-right corner.
- Product-wise token: Prints a separate token for each product (useful for food courts).
- Show parcel in all items: Prints parcel for all items like Parcel order type for TAKEAWAY.
- Allow reprint for staff: Allows staff members to reprint bills and tokens.
- Print end shift summary report: Automatically prints a summary when closing a shift.
- Show paid text: Prints Paid text in the top-right corner of the receipt.
- Show GST abstract section: Prints a summary table of GST rates and amounts at the bottom of the bill.
- Show MRP column: Prints an MRP column on the receipt (displays the MRP entered during product creation/editing).
- Disable estimate label: The Estimate label will not be printed on table estimate bills.
- Show full price (Incl. GST): Displays the item rate inclusive of GST.
- Show tax invoice label: Labels the receipt as Tax Invoice.
- Don’t show balance in credit bill: The balance amount will not be printed on credit bills.
- Show description in KOT: Prints the product notes on the Kitchen Order Ticket.
- Counter-wise kitchen order token: Generates separate KOTs for different counters (e.g., Kitchen, Juice Stall).
- Counter-wise bill: Generates separate bills based on different counters.
- Order Prefix: Prefix to be printed before order number.
- Custom Order Label: Name to be printed instead of default "Order No".
- Line Feed: Number of Empty Lines after a print job.
Step 4: Configure logo & QR information
- Print Logo: Prints your restaurant logo at the top of the bill (requires logo upload in Logo settings). Specify the logo height and width.
- Print Review QR: Prints a QR code for customer reviews. Select the QR size (Small, Medium, Large) and QR type (Positeasy link / Custom link). Specify the header and footer.
- Show Payment QR: Prints a UPI/payment QR code that customers can scan to pay the bill. Select whether to print Payment QR in all payment modes, QR size (Small, Medium, Large), and header/footer.
- Pickup QR: Prints a QR code for order pickup verification (used by delivery staff). Select the QR size and specify the header/footer.
- Billing QR: Prints a unique QR code or barcode for each order. Select the QR size and specify the header/footer.
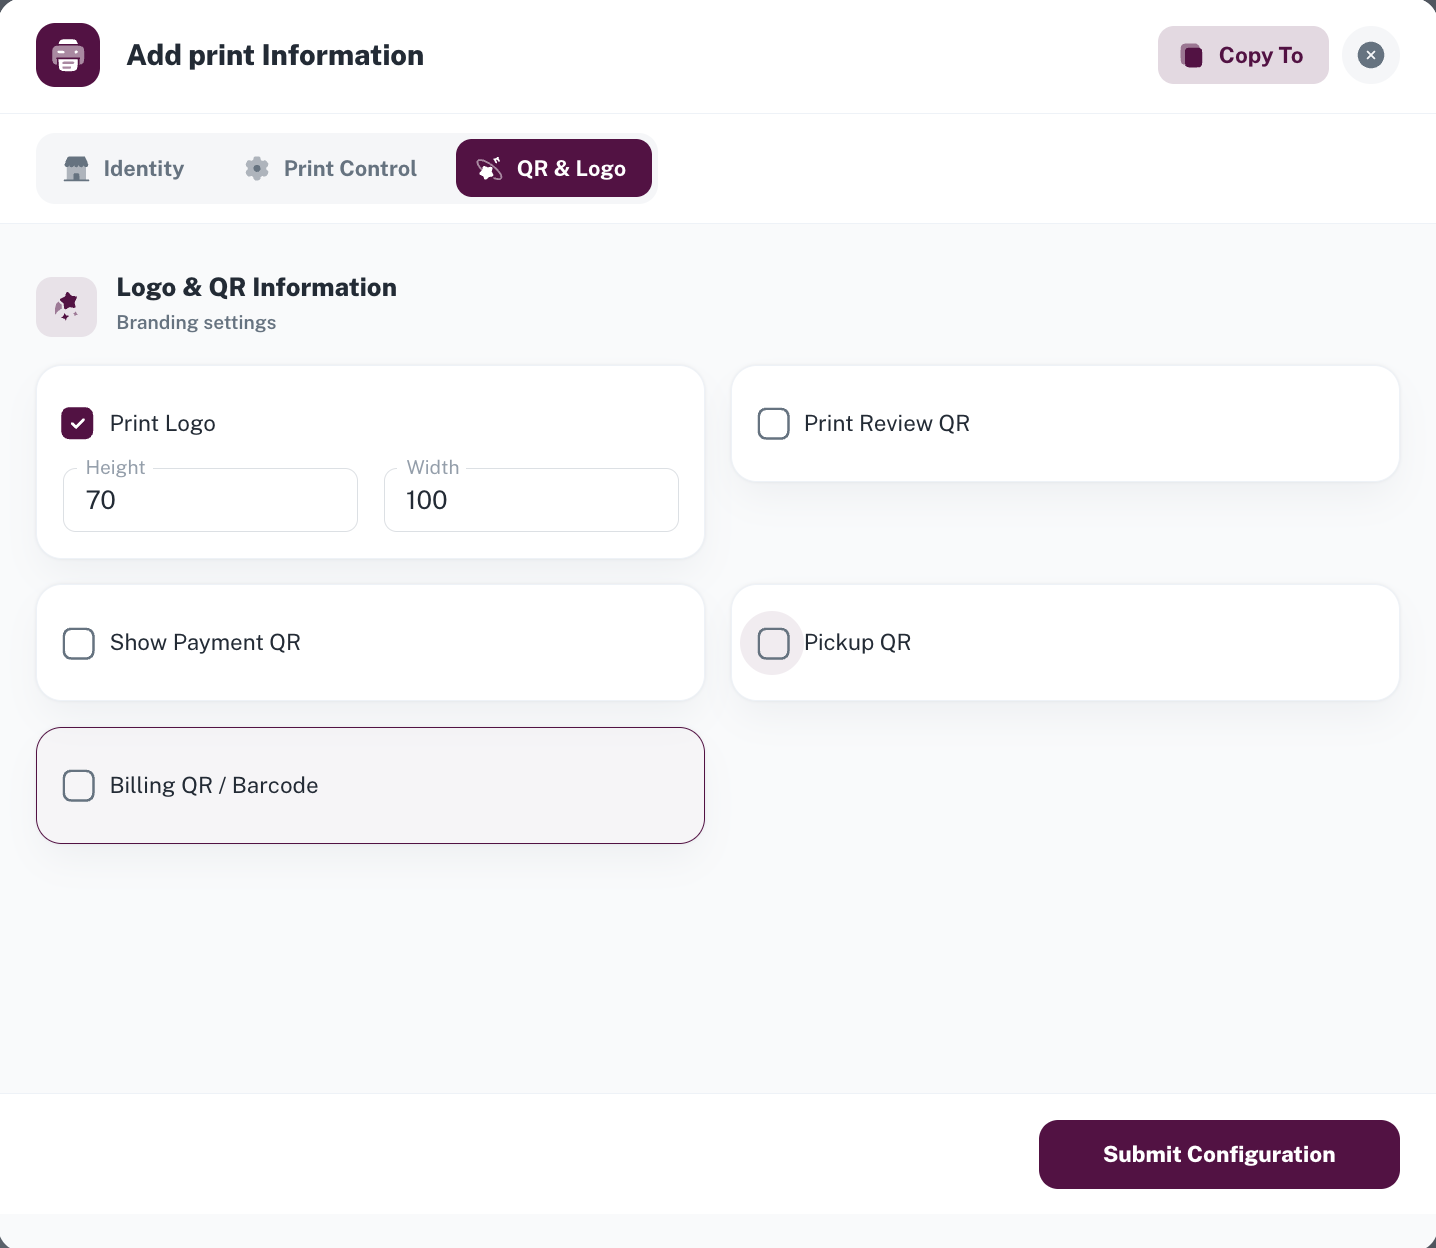
Click Submit Configuration after making the necessary changes to save the printer configuration.
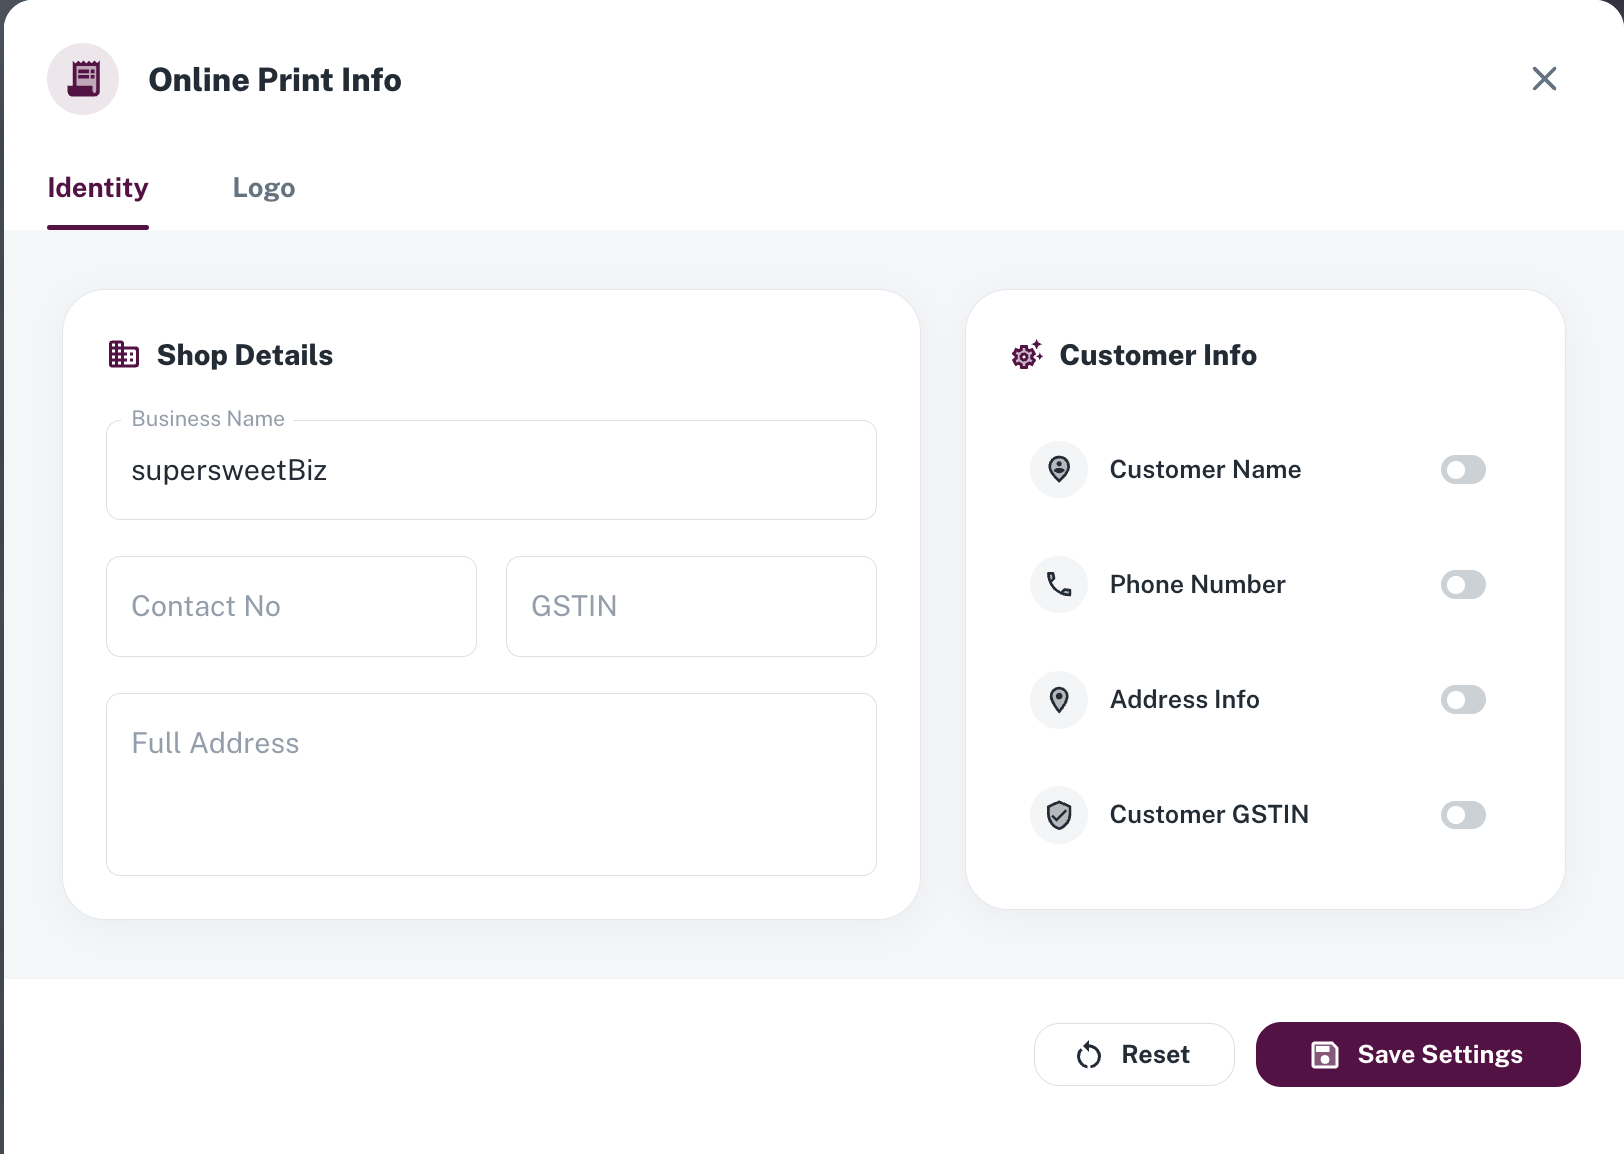
Step 5: Online Print Info
If online receipt is enabled in the route setup for the printer profile. We can see the Online print info button in the printers settings.
Online Print Info/Identity
Shop details
- Business name : The shop/business name to be printed in the receipt
- Contact No : Enter the contact number to be printed on the bill receipt.
- GSTIN : Update the GST number.
- Full Address : Address of the business to be printed in the receipt.
Customer Info
In the Customer Information section, control which customer details appear on the receipt:
-
Customer Name
-
Phone Number
-
Address Info
-
Customer GSTIN
Logo
- Prints your restaurant logo at the top of the Online bill (requires logo upload in Logo settings). Specify the logo height and width.
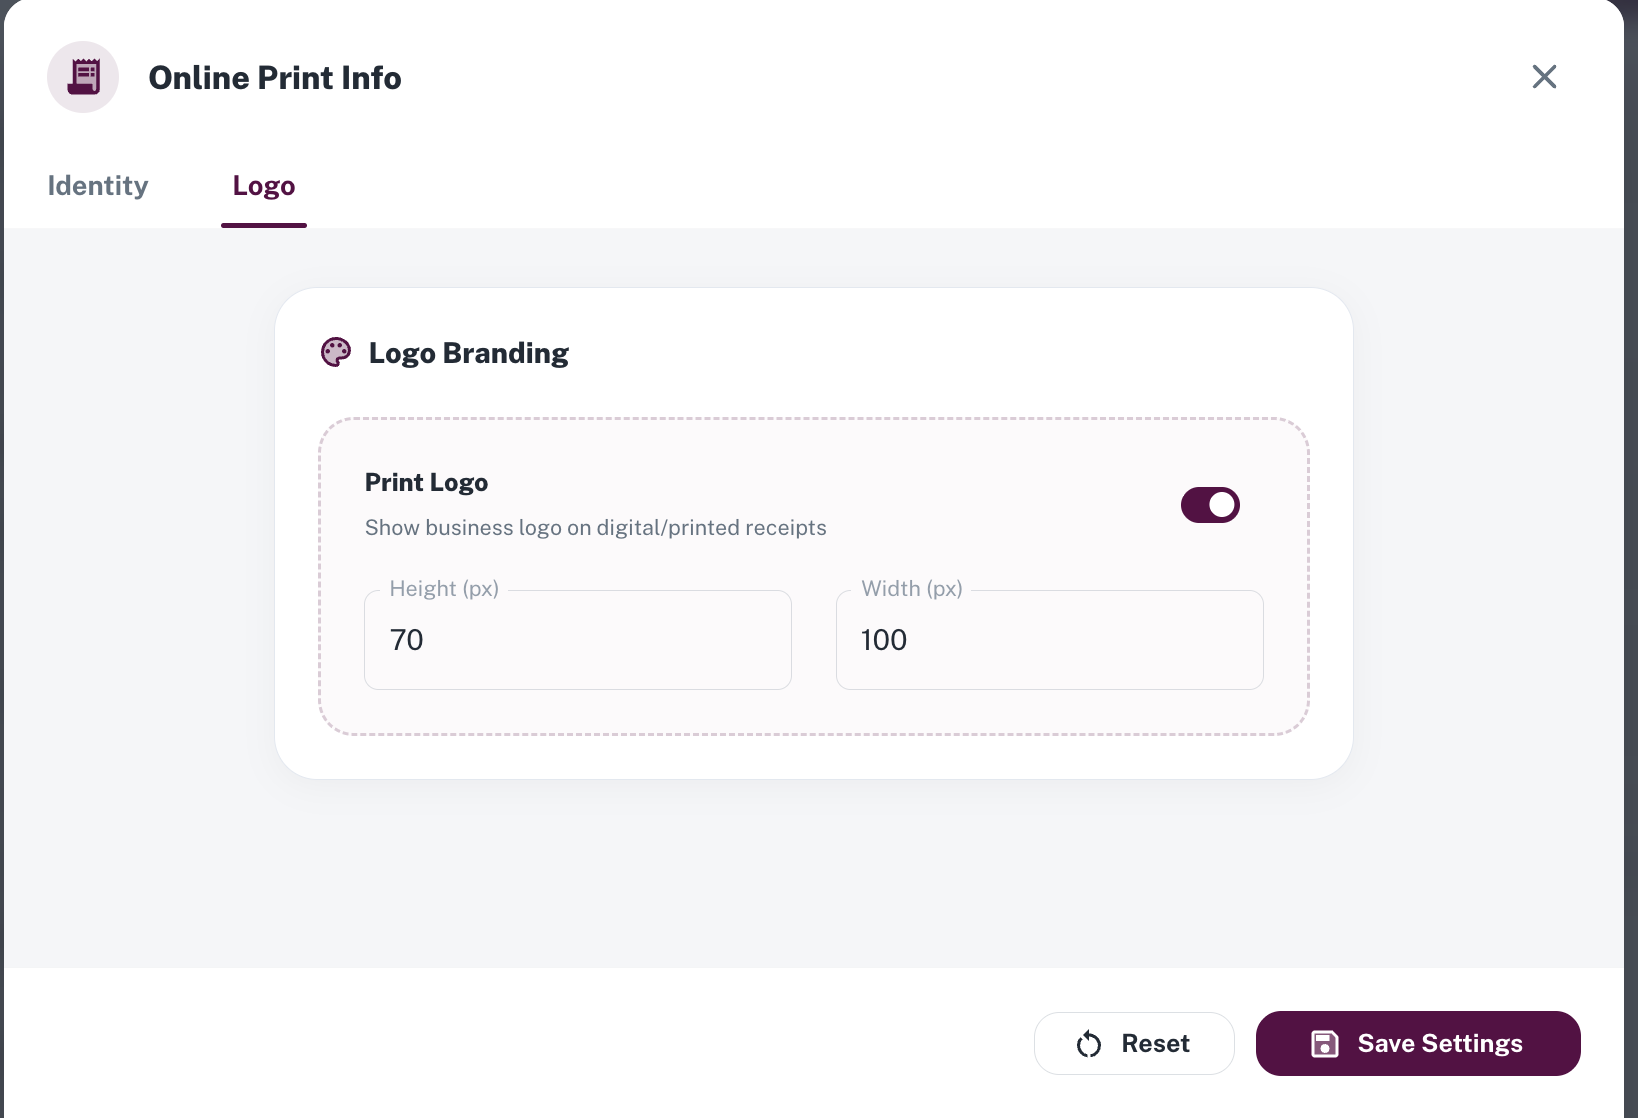
Click Save Settings after making the necessary changes to save the online printer configuration.
Step 6: Sync and refresh Staff App
- Sync and refresh the Staff App to apply the updated printer settings.
- Test billing in the Staff App to verify that the changes are reflected correctly.